Before I start, if you find Videos easier to digest and understand then skip to the bottom of this post for a step by step video guide showing you all the tricks and tips you will need!
I won’t go to far into the criticism that the Playstation classic has received, some people believed the games included were a bit crappy, there was a lack of dual shock controls and of course the user interface of the system itself is pretty bare bones. However, lucky for us the guys over at sony were pretty lax about security and it wasn’t too long before people were plugging all kinds of things into the USB ports on the front of the machine. With a bit of tinkering, a USB stick and a bit of software you are actually able to play any Playstation game you want! Pretty neat hey, so onwards with the show. Don’t forget to leave a like on this video if you are a fan of the Playstation or game hacking in general and of course subscribe with notifications on if you are new to the Mayhem too!
Oh and I will quickly mention that any tinkering with the console could possibly lead to bricking it as you a technically making it do things that it wasn’t designed for. Whilst the software we will use has been tried, tested and working there is always a bit of a risk. So if you are a scardy cat or paranoid then this might not be the best video for you to be watching.
Ok Guys, the easiest way to do this is to break It down into nice simple steps, like any tutorial.
AutoBleem Download Below
So the first thing you are going to do is Download AutoBleem from this link (mirror if you have problems with the regular download) to get a zip that contains a ready to use version of AutoBleem USB ready to build 0.5.1. This neat little package was put together by YouTuber Madlittlepixel so many thanks to him for making this whole process a lot easier as it contains everything you need to get started without any mucking around yourself. He did have it uploaded on dropbox but at the time of doing this video it had been removed so I thought I’d mirror it for you guys. All props to Madlittlepixel though! If you are interested in the finer details of AutoBleem which includes a new beta release, feel free to check out the github page in the description below for more info. If you are unsure of anything in this tutorial that page should help you fill in the blanks.
Git Hub Page: https://github.com/screemerpl/cbleemsync/releases
Once you have downloaded the AutoBleem zip from the link below, you simply un-zip it to your hard-drive. This may take a little while as there are lots of little files making up a nearly 700mb package.
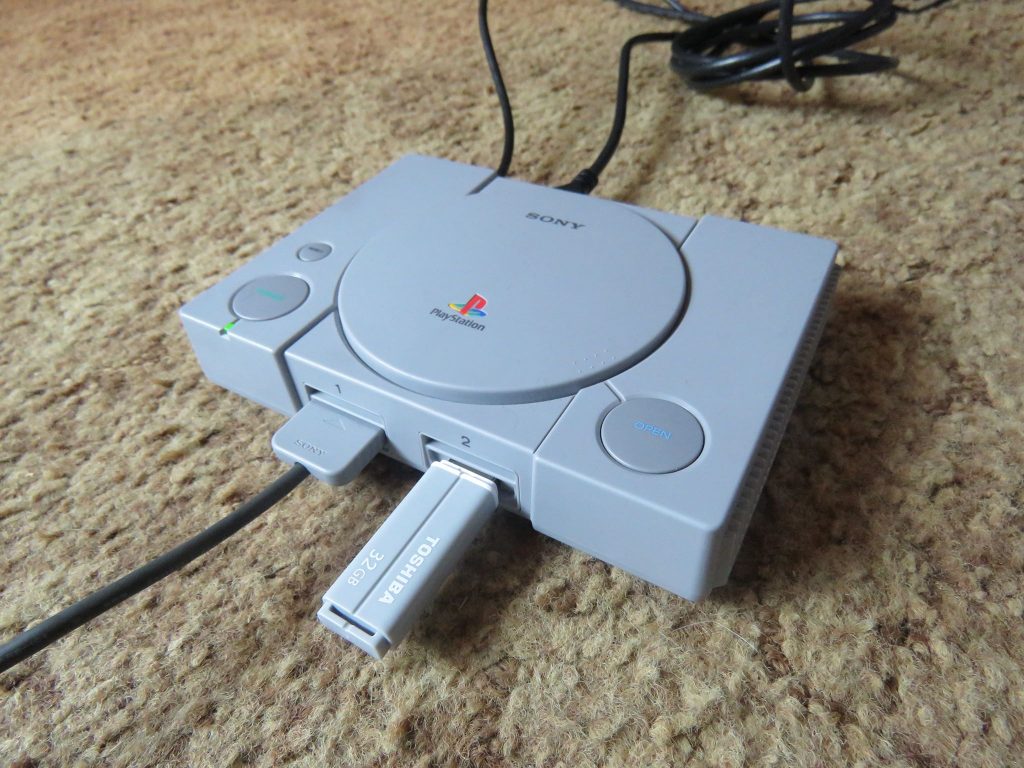
Now it’s time to prepare your USB stick. It’s very important to name your USB flash drive “SONY” with all caps as well as formatting the flash drive to FAT32. This is an important step so don’t forget this one.
Once Autobleem has finished unzipping itself, copy across the entire inside of the new AutoBleem folder onto your USB 2.0 stick root. I have heard that there can be some glitching with USB 3.0 sticks, possibly because the Playstation Classic uses USB 2.0, but you can give a 3.0 a try if that’s all you have, I’d be interested to hear if it works ok so let us know in the comments below if you test this out.
Once that’s all done it’s time to copy your Playstation rom’s, the bin’s and the cues, into the “Games” folder that is now on your USB stick. Make sure you have the files in a folder labelled as the game’s name. This not only makes things cleaner it also is how AutoBleem works. It can also make it easier to find games if there are multiple variations and/or installations of it. Madlittlepixel again talks about how this newer version of AutoBleem handles names, so make sure you check out his more detailed video on the subject, I’ll leave a link to his awesome video in the description below.
Now, Make sure your Playstation Classic is unplugged (no red light or any lights on the console) and then plug in your USB into the player 2 controller slot.

Now go ahead and plug in and boot up your playstation classic and once the light flashes green and red a few times you should be met with an AutoBleem interface with any luck, push X as prompted to scan for new games and then off you go ready to play around with settings or enjoy your legally obtained PS roms or jump back into the regular PS classic.
Autobleem is super simple to use and also keeps the same features of the PlayStation classic like hitting the “open” button to change discs, hitting reset to make a save state or even switch back to the original PS classic interface at the touch of the circle button on the home screen.
This little hack is amazing and really opens up the PS classic to something more amazing than it already is! If you haven’t already purchased one as I said in the intro they are under $40 on amazon at the moment and I’ll leave an affiliate link below. I don’t know how long the price will stay this low so hurry up and grab one, even if you don’t plan to use AutoBleem! They are a ton of fun even stock standard.
The only thing I’m unsure about personally, that perhaps someone in the comments can chime in with, is playing 2 player games whilst using this hack. Because the second controller port is in use with the flash drive I’m not certain if there is a way to go 2 players with these emulated games. If you know how please let us all know below in the comments below and I’ll pin an update if we have one.


